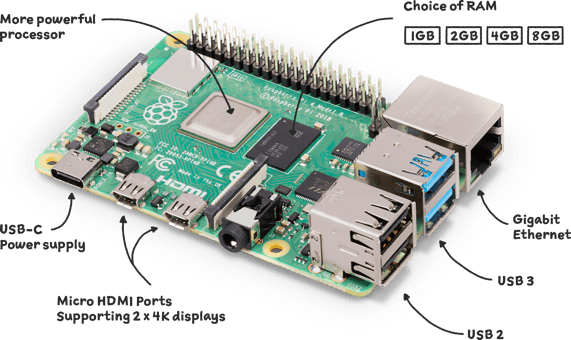
A Network-Attached Storage (NAS) is a great way to store and share files across multiple devices in your home network. Using a Raspberry Pi 4B, you can easily create your own DIY home NAS.
Here are the steps to set up a home NAS with a Raspberry Pi 4B:
- Get the required hardware: Raspberry Pi 4B, MicroSD card, Power supply, Ethernet cable, and external hard drive or USB drive.
- Download and install the Raspberry Pi OS on the MicroSD card using the Raspberry Pi Imager.
- Insert the MicroSD card into the Raspberry Pi 4B and connect it to a monitor, keyboard, and mouse.
- Connect the Raspberry Pi 4B to your home network using an Ethernet cable.
- Power up the Raspberry Pi 4B using the power supply.
- Open the terminal on the Raspberry Pi and run the following commands:
sqlCopy codesudo apt-get update
sudo apt-get upgrade
sudo apt-get install samba samba-common-bin
These commands will update the Raspberry Pi’s operating system and install the Samba file-sharing software.
- Create a folder on the external hard drive or USB drive to store your files. You can do this by running the following command:
bashCopy codesudo mkdir /mnt/mydrive
Replace “mydrive” with the name of your drive.
- Configure Samba by editing the smb.conf file:
bashCopy codesudo nano /etc/samba/smb.conf
Add the following lines to the end of the file:
javaCopy code[MyShare]
comment = My Share
path = /mnt/mydrive
browseable = yes
writeable = yes
guest ok = yes
create mask = 0777
directory mask = 0777
Replace “MyShare” with the name of your share and “My Share” with a description of your share.
- Restart the Samba service by running the following command:
Copy codesudo systemctl restart smbd
- You can now access the shared folder from any device on your home network by typing the Raspberry Pi’s IP address followed by “/MyShare” in a file explorer window. For example, if the Raspberry Pi’s IP address is 192.168.1.10, you would type “192.168.1.10/MyShare” in the file explorer window.
Congratulations! You now have your own DIY home NAS with Raspberry Pi 4B.


No responses yet